Kitchen Splashback Ideas NZ 2026: Materials, Costs & Styles That Actually Work
She picked the tiles herself. Ordered them online, loved the sample, ticked the splashback off the list and moved on.
Six months later, sitting at the kitchen bench in her Mt Eden villa, Sarah couldn't stop looking at it. The grout was already staining. The subway tiles, perfectly fine in isolation, had turned a warm, light filled kitchen into something that looked like a public bathroom. Every week, another scrub. Every scrub, a reminder.
It wasn't that the tiles were cheap. They weren't. It's that nobody had told her what a splashback actually does to a kitchen, or which material holds up behind a gas hob, or why that shade of white reads warm in a showroom and cold in a north facing Auckland kitchen.
If you're planning a kitchen renovation and the splashback feels like an afterthought, this guide is for you. We'll cover the materials that work in NZ kitchens, what they actually cost in 2026, and the decisions that matter most when you only get one shot at this.
Not sure which splashback suits your kitchen?
Get a free design assessment from QK Renovation. We'll show you what works in your space.
What Your Splashback Is Actually Doing
A splashback protects the wall behind your cooktop and bench from oil, steam, and water. But it also covers 30% to 50% of the most viewed wall in your kitchen, and it has a bigger visual impact than most homeowners expect.
Get it right and it ties the whole kitchen together. Get it wrong and even a beautifully fitted kitchen can feel off, every single day.
The good news: there are more material options available in NZ now than ever, at a wider range of price points. The trade off: more options means more decisions.
Key takeaways:
* A splashback serves both a practical and a visual function; don't treat it as a last minute tick
* It covers a significant portion of your kitchen's focal wall
* Material choice affects maintenance, cost, and how the kitchen reads long term
The Most Popular Splashback Materials in NZ (and What They Really Cost in 2026)
Prices below are installed costs including materials and labour, for a standard kitchen splashback of roughly 1 to 1.5 sqm. Larger runs or custom setups cost more.
Ceramic and Porcelain Tiles: $350 to $900 installed
The most common choice in Auckland renovations. Tiles give you the most flexibility on colour, pattern, and texture, and they're easy to replace if one cracks.
Porcelain is harder and more water resistant than ceramic, worth the small premium if you cook often. Large format tiles ($600 to $900 installed) are trending because they reduce grout lines and feel more seamless.
Watch out for: Dark grout that stains, or light grout that never stays white. A sealed grout product adds $50 to $100 and is worth it on every job.
Good for: Any kitchen style. Budget to premium.
Key takeaways:
* Standard tiles remain the most flexible and cost effective option
* Large format porcelain minimises maintenance and looks more modern
* Seal your grout; it's cheap insurance
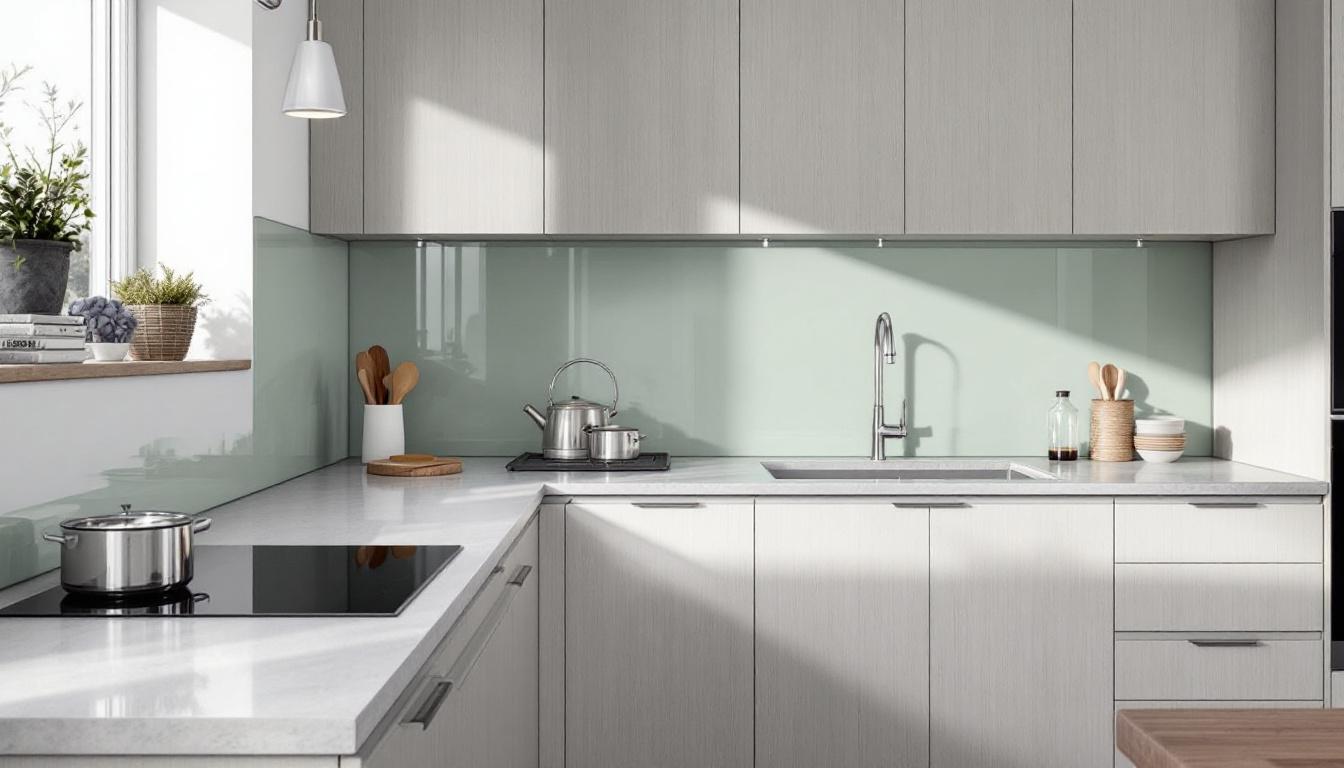
Glass Splashbacks: $500 to $1,200 installed
Toughened glass panels are single piece, grout free, and extremely easy to wipe down. Popular in contemporary NZ kitchens, especially new builds.
Printed or back painted glass is available in almost any colour. Your kitchen, your Resene swatch, custom matched. Most glass splashback suppliers in Auckland will cut to size including power point holes.
Watch out for: Behind a gas hob, glass can discolour slightly from heat over time. Specify heat resistant toughened glass; not all panels are equal. Installation also requires precision because any wall imperfections read clearly through glass.
Good for: Modern, minimalist kitchens. Households that want low maintenance cleaning.
Key takeaways:
* Grout free means one wipe and you're done
* Custom colour match is a genuine advantage for bespoke kitchens
* Confirm the panel is rated for use behind gas or induction before ordering
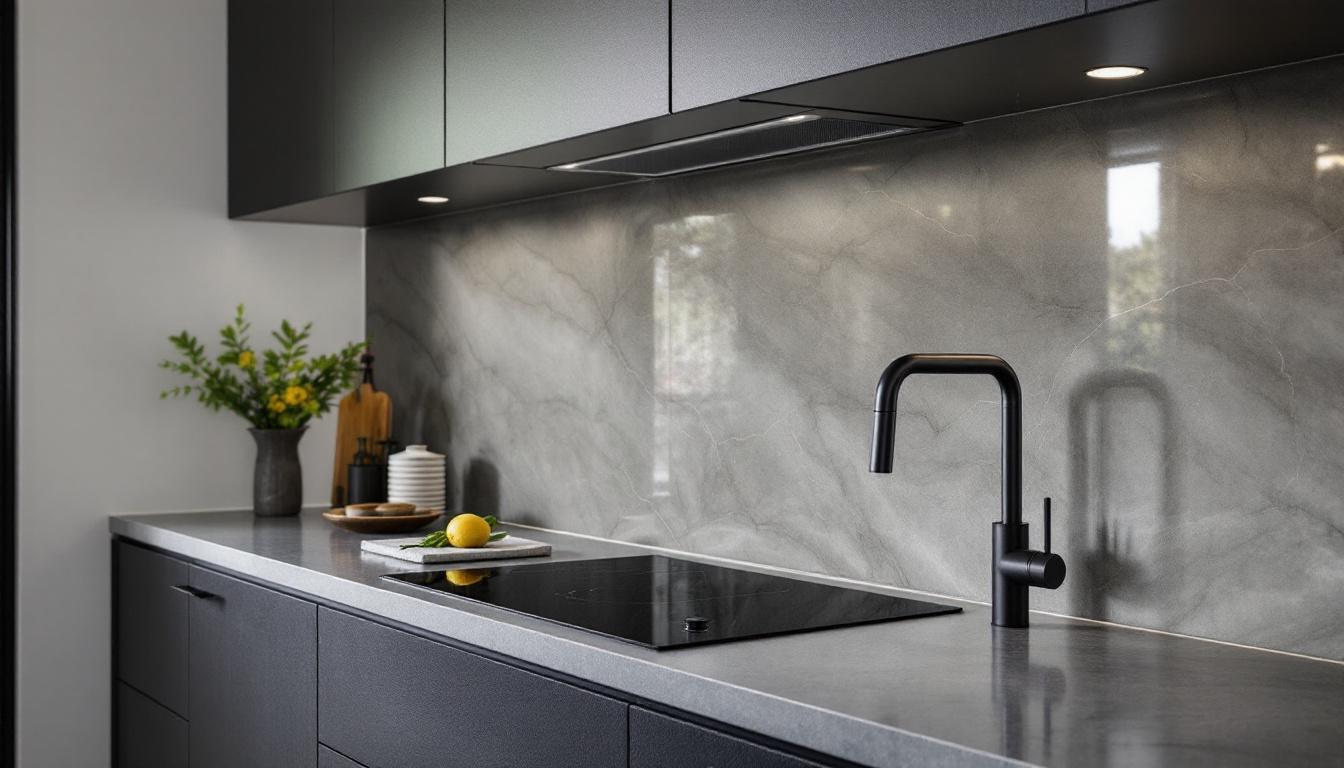
Stone and Engineered Stone: $800 to $2,500+ installed
Natural stone (marble, granite, schist) or engineered stone (Caesarstone, Silestone) brings a premium finish that's hard to replicate with other materials.
Engineered stone is more practical than natural stone. It's non porous, doesn't need sealing, and handles heat better. Many Auckland homeowners match their splashback to their benchtop for a continuous look.
Watch out for: Natural stone is porous and can stain. Even engineered stone shouldn't be used directly behind high output gas burners without checking the manufacturer's spec.
Good for: Premium renovations and open plan kitchens where the splashback ties into the overall material palette.
Key takeaways:
* Engineered stone is the practical choice over natural stone for most kitchens
* A benchtop to splashback match creates a seamless, expensive looking result
* Budget at least $1,500 installed for a quality outcome
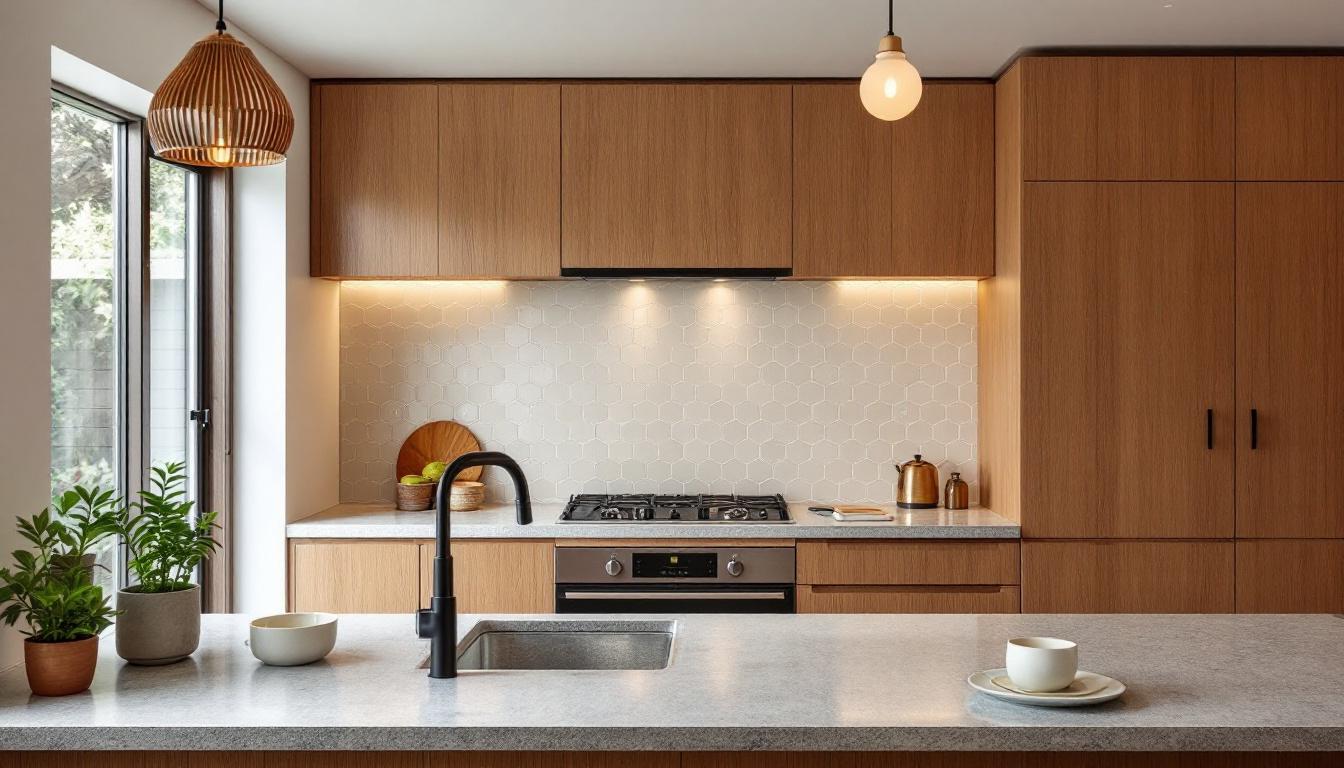
Brick and Feature Tiles: $600 to $1,400 installed
Exposed brick effect, handmade tiles, textured terracotta, zellige. These all sit in the "feature splashback" category. They add character and warmth to a kitchen and are popular in villa and bungalow renovations across Auckland.
The maintenance trade off is real: irregular surfaces trap grease more readily. If you cook with oil often, a smooth surface tile or glass behind the hob with feature tiles on the flanking wall is a sensible compromise.
Good for: Character homes and kitchens that need warmth and personality.
Key takeaways:
* Feature tiles add character but need more cleaning behind the hob
* Consider a mixed approach: smooth surface behind the cooktop, feature tile on the flanking wall
* Works best in traditional or transitional kitchen styles
The Splashback Decisions That Matter Most
Height
Standard splashback height is bench to underside of overhead cabinet, roughly 500 to 600 mm. Full height splashbacks (bench to ceiling) are increasingly common and add a clean, architectural quality to the kitchen. Budget an extra $200 to $600 for the additional material.
Colour and Tone
Light kitchens: almost anything works. Warm toned tiles, white glass, stone.
Dark kitchens: consider a lighter or more reflective splashback to bounce light. A matte dark tile on dark cabinets can make a kitchen feel heavy.
North versus south facing: test your material sample in the actual space at different times of day. What reads warm in a showroom can look cold under your kitchen lights at 6 pm in July.
What Goes Behind Your Hob
Not all materials are rated for direct heat exposure. Confirm before you order, especially for gas hobs. This applies to glass, engineered stone, and some tile adhesives.
Key takeaways:
* Full height splashbacks are worth the additional cost in most contemporary kitchens
* Test colour samples in your actual kitchen lighting, not in a showroom
* Always confirm heat rating for the section directly behind the cooktop
What a New Splashback Costs as Part of a Full Kitchen Renovation
A splashback is typically 5% to 10% of a full kitchen renovation budget. For context:
| Kitchen renovation scope | Total cost (NZD) | Splashback estimate |
|---|---|---|
| Refresh (new doors, hardware, splashback) | $10,000 to $25,000 | $400 to $900 |
| Mid range renovation | $30,000 to $60,000 | $700 to $1,500 |
| Premium fit out | $70,000 to $120,000+ | $1,200 to $2,500+ |
If you're only replacing the splashback as a standalone update, labour for removal and installation runs $200 to $500 depending on complexity (whether existing adhesive is salvageable, whether power points need rerouting, and so on).
For a deeper read on where the dollars actually go inside a kitchen reno, our breakdown of kitchen cabinetry costs in NZ for flatpack versus semi custom versus full custom covers the biggest single line item by far.
You can also see the full range of options we offer on the kitchen renovations service page.
Styles That Work Well in NZ Homes (2026)
These are the combinations we're seeing most in Auckland kitchens right now:
White shaker cabinets with large format white or grey subway tile. Clean, timeless, works in any era of home. Hard to get wrong.
Painted or handleless cabinets with back painted glass in a matching tone. Seamless and easy to clean. Popular in new builds and contemporary renovations.
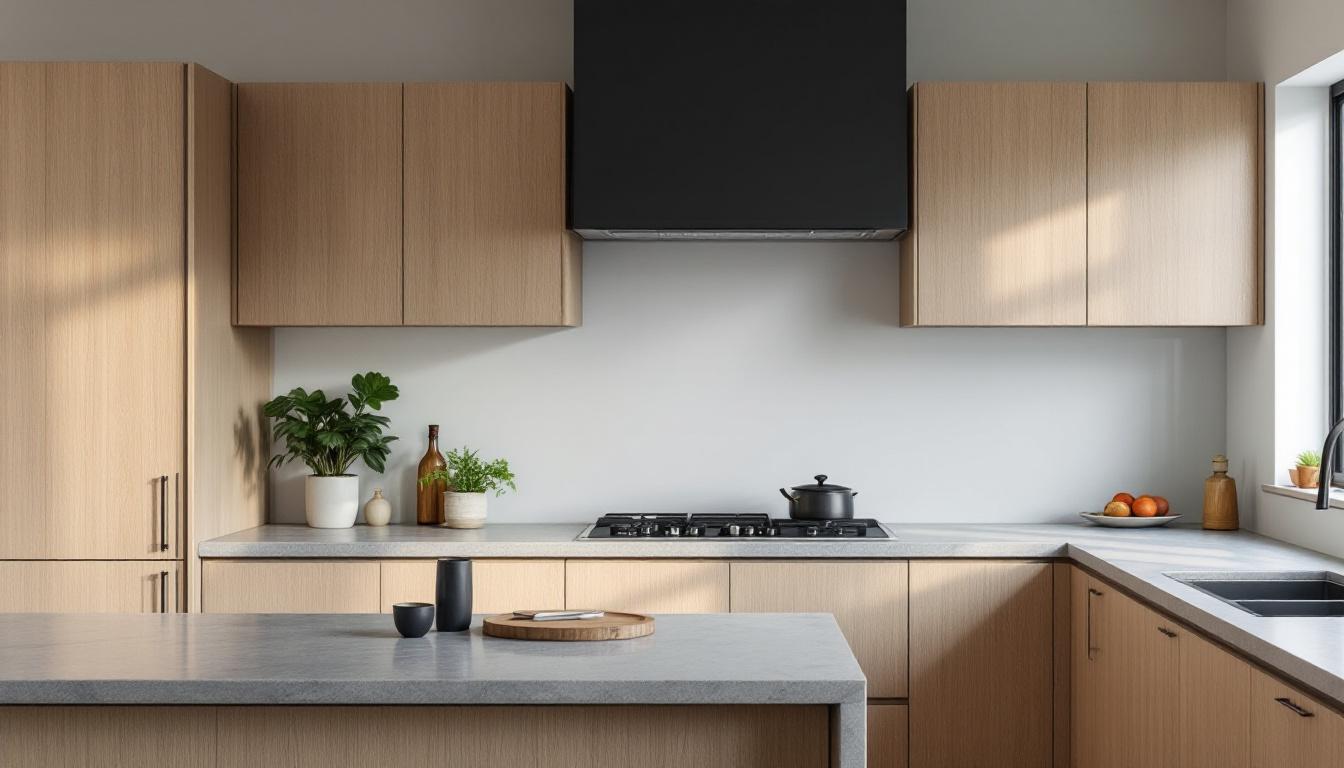
Natural timber or oak cabinets with zellige or handmade tile. Warm, textured, character forward. Common in villa and bungalow renovations.
Dark (navy or charcoal) cabinets with stone or engineered stone splashback. Premium, dramatic, works when you have good lighting.
White or cream kitchen with Calcutta marble or marble look porcelain. Consistent seller. Easy to live with, photographs well for resale.
How a Splashback Fits Into Whole Home Plans
If you're renovating more than one room, the splashback decision usually ties back to a larger material palette. Choosing benchtop, splashback, flooring, and cabinetry as a coordinated set takes the pressure off any single decision and gives the home a coherent feel.
Our home renovation Auckland service covers how we coordinate across kitchen, bathroom, and living areas so each room reads as part of one project, not three disconnected ones.
Key takeaways:
* Coordinate splashback with benchtop, cabinetry, and flooring choices across the home
* Mixing too many strong material statements in adjacent rooms reads as cluttered
* A single, calm material palette across rooms photographs better for resale
FAQs
Do I need to tile the whole wall or just behind the bench?
The NZ Building Code requires the splashback to cover the area directly behind the hob and within 150 mm of the cooktop edges. Most homeowners extend it to the full bench to cabinet height for practical and visual reasons, but you're not required to go further.
Can I tile over my existing splashback?
Sometimes. If the existing tiles are flat, firmly adhered, and the wall can carry the added weight, yes. Your builder should check before assuming this is possible. Tiling over loose or compromised tiles risks failure.
How long does splashback installation take?
A standard tile splashback takes one to two days including adhesive cure time before grouting. Glass panels can be installed and ready in a single day.
Will my splashback affect my kitchen's resale value?
An outdated or damaged splashback is one of the first things buyers notice. A clean, modern update has an outsized visual impact relative to cost, and it's one of the higher ROI kitchen refreshes you can do.
Is glass or tile easier to clean behind a hob?
Glass wins clearly. One wipe and it's done. Tiles need more care with grout, especially behind a gas hob, where oil splatter accumulates faster than people expect.
Next Step
A splashback seems like a small decision until you're looking at it every day. Talk to the QK Renovation team. We'll help you pick a material, style, and finish that works with your kitchen and your life. Free assessment, no pressure.